I seeded my original map for the campaign sandbox with a series of "Lurid Lairs" (a la Judges Guild's Wilderlands of High Fantasy)—one-or two-sentence descriptions of a potential encounter/adventure area that could be ad-libbed easily should the players wander into it. One of these was the following site, nestled in a box canyon well within walking distance of the keep:
Dozens of rock cairns spawn the ancient skeletons of slain warriors that rise from the dead to attack. One has a +1 weapon.On one of the party's initial forays into the Badlands, I rolled some encounter checks for their trek and came up with two results: Discovery > Trail and Monster > Undead > 1d3+1 Skeletons. The first encounter occurred just a few miles down the southern canyon, so it seemed a perfect opportunity to cram the two encounters together and introduce the lurid lair.
I had the skeletons rush the party from the western cliffs and they were defeated easily. I then informed the players that they could see a faint trail leading up the craggy cliff terraces into the wall-like ridgeline. They decided to follow the trail and subsequently found a shortcut through the otherwise-impassable ridges into the box canyon on the other side.
They moved down into the pine thicket below and I described how they spotted several rock cairns mingled within the trees. They tracked the skeletons to a cluster of cairns which had been uncovered—the skeleton's former graves. Within, they found some grave goods and money, their first decent haul of treasure to this point. This excited them and they began searching some other nearby cairns for more, but the session soon drew long and they decided to hoof it back to the keep with their loot.
They declared their intent to return to the site for more booty the following session, so in the week between those sessions—and inspired by Greg Gillespie's excellent Barrowmaze megadungeon—I decided to develop the lurid lair beyond the initial description. The next session turned into multiple sessions and further development of the site into a full-blown encounter area that laid the foundation for a major campaign story thread and introduced the party to the Cult of Khoss.
This encounter area is written using 5th edition rules, but is easily adapted (I believe) to earlier editions of the game. Below the cut is the full write-up for this area, which I titled: The Dead Pines.

NOTE: Some of the following details and creatures were borrowed (plundered) lovingly from Barrowmaze. I'm too lazy to track back all the references, so anything that matches or even resembles that publication is credited to Mr. Gillespie without reservation (it's a great adventure...go buy it).
- A society of hill people (the Coyote Clan) once lived in these parts and buried their dead here. Remnants of these folk can be found all over the Badlands.
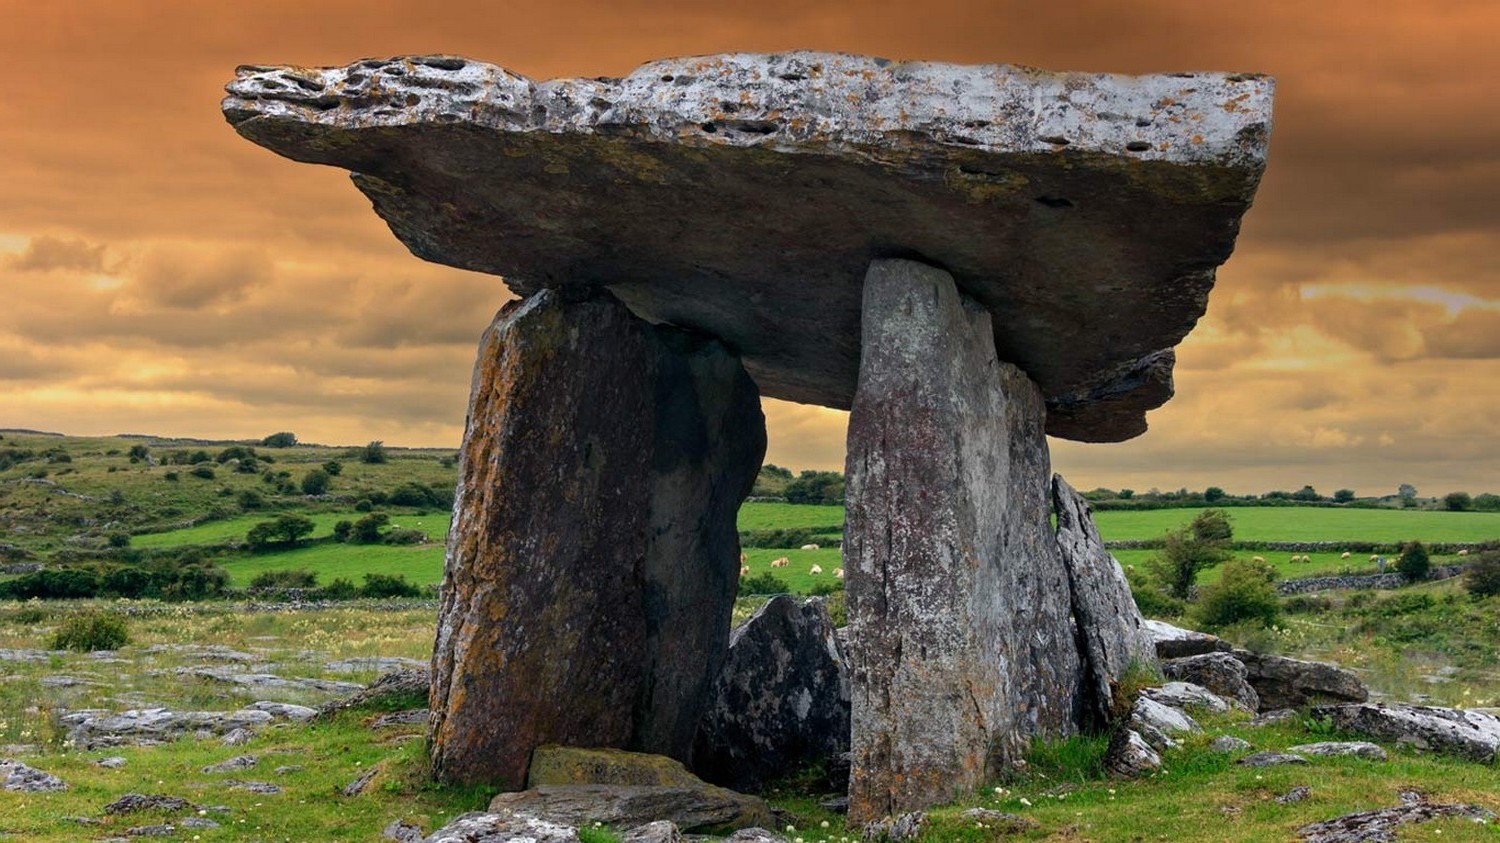
- The area is covered with dozens of stone cairns and barrow mounds of various sizes. A prominent dolmen stands atop a lonely hill at the graveyard's center.
Some barrow mounds are sealed, others are completely covered over with centuries of soil and rock; still others have been opened and plundered by tomb robbers employed by the Cult of Khoss, operating from a hidden camp in a pine thicket on a western escarpment.
The tomb robbers recently discovered the dolmen tomb in the heart of the graveyard and have begun plundering the tomb beneath. Their depredations have caused the dead to rise and defend their resting place.
- Sub-hexes with pine forest count as difficult terrain; the sandy, boulder-strewn areas between the thickets are easier-going, only reducing base Speed by 5.
Line-of-sight within a pine thicket is reduced to 60 ft. due to trees and scrub.
Searching a sub-hex takes (3+1d3) x 10 minutes, and the party will find any cairns or barrows located within it.
- Merely passing through a hex without searching it provides a DC 10+1d6 Perception check to spot one cairn or barrow in the hex along their path (if any are present).
NOTE: The following material uses "exploding" d3s where indicated by (#d3*). For these cases, roll 1d6 and divide by 2 to determine the final result, but on a '6,' roll a second 1d6 (divided by 2): on a '1', the count stays at '3'; on a '6', roll another dice and repeat)...
Weird Event: (1d6) 1-2 = a cold fog rolls in (contains 1d6-1 skeletons – roll below); 3 = a blood-curdling shriek echoes across the canyons (source: the barrow harpies); 4 = nearby trees drip blood; 5 = a pack of ghostly coyotes races through the party, then vanishes (DC 12 WIS save or frightened for 1 hour); 6 = 1d3* corpse candles (harmless) drift through the trees for 1d3x10 minutes, luring the party in the direction of the Dolmen Tomb, then vanish.
Lesser Skeletons: (1d6) 1-4 = 3d3* brittle skeletons (on any 6s, add 0-2 regular skeletons and re-roll another d3*); 5-6 = 2d3* skeletons (on any 6's, add 1d3 brittle skeletons and re-roll another d3*).
- Brittle skeletons are loose assemblages of bones that move with a rattling, herky-jerky gait. Because of their loose structure, two brittle skeletons can occupy the same space and attack without disadvantage. They otherwise act and fight as normal skeletons (using clawed hands), but shatter into bony fragments with a single hit that does any damage.
- Brittle skeletons are loose assemblages of bones that move with a rattling, herky-jerky gait. Because of their loose structure, two brittle skeletons can occupy the same space and attack without disadvantage. They otherwise act and fight as normal skeletons (using clawed hands), but shatter into bony fragments with a single hit that does any damage.
Rats: (1d6) 1-4 = 1d3* rat swarms (on any 6's, add 0-2 giant rats and re-roll another d3*); 5-6 = 2d3 giant rats (on any 6's, add 1 rat swarm and re-roll another d3*).
Tomb Robbers: Daytime ONLY; at night, this is a "no encounter"; (1d6) 1-4 = 1d3+2 tomb robbers; 5-6 = 2d3+2 tomb robbers. (See Tomb Robber Camp below for stats.)
Greater Skeletons: 1-4 = 3d3 skeletons; 5-6 = 1 skeletal warrior plus 2d3* brittle skeletons (on any 6's, add 1 regular skeleton and re-roll another d3*).
- Skeletal Warriors are similar to standard skeletons, but have 4d8+8 hp and 14 STR. They wear lamellar armor and wicker shield (AC 16), and attack twice each turn with a bronze khopesh (+4 to hit, 1d6+2 slashing damage); they have advantage on saves to resist being turned, and can use their reaction to Parry = +2 AC against a single attack.
- Skeletal Warriors are similar to standard skeletons, but have 4d8+8 hp and 14 STR. They wear lamellar armor and wicker shield (AC 16), and attack twice each turn with a bronze khopesh (+4 to hit, 1d6+2 slashing damage); they have advantage on saves to resist being turned, and can use their reaction to Parry = +2 AC against a single attack.
Monster: 1-2 = 1d3+1 ghouls (if a 6 is rolled on the d3, 1-2 are ghasts); 3-4 = 1-2 giant vultures + 2-4 vultures; 5-6 = 1d3 will-o-wisps.
__________
–Cairns
The most commonly-found gravesite, these simple stacks of natural stones cover a burial depression. Cairn sites are marked on the map with small white dots; each cairn location is typically a cluster of 1d3* graves.
- [1:6] cairn sites have already been plundered by the tomb robbers.
Uncovering a cairn takes 20 + (1d4x10) min. by hand, or half the time with proper tools (pick, shovel, crowbar).
- A cairn contains bones plus [roll d20]: 1-4 = skeleton (roll 1d6: 1-4 = brittle skeleton; 5-6 = skeletal warrior); 5-12 = just bones; 13-17 = bones + minor treasure (see Treasure table below); 18-19 = bones + 1d3 grave goods (see below); 20 = bones + small treasure hoard (1d3* grave goods + moderate treasure x2 – see Treasure table below).
–Barrow Mounds
These man-made hillocks typically cover one or more burial chambers that form a crude tomb in which higher-ranking members of the clan (and possibly their cohort) are interred. Barrow sites are marked on
the map with large white dots. Each barrow location represents a single tomb.
Barrow mounds are found in one of the following states:
- Sealed Mounds: The entrances to these barrows are covered with a thick stone; they have not been looted.
Prying the stone seal open requires at least two laborers with proper tools (pick, sledgehammer, crowbar, rope) and takes 30 min + (1d6 x 10) mins.
- Opening the seal makes noise = +5 to any encounter check rolls.
- Covered Mounds: The entrances to these barrows have been buried through time and shifting earth. The entrance stone must first be found and then excavated to open it (as Sealed Mound).
Finding the entrance requires (1d3* x 10) min.; rolling a Perception check vs. DC (9+1d6) reduces the search time by 5 minutes per measure of success (e.g., succeeding the check by '3' reduces the search time by 15 minutes).
- Excavation requires (1d4 + 2) hours of digging by at least four laborers with appropriate tools (shovels, picks, etc.)
Every two additional laborers reduces the total excavation time by 1 hour (to a minimum of 1 hour excavation time).
- Plundered Mounds: These barrows have already been opened and looted by tomb-robbers.
A broken cover-stone can be found near the open entrance.
- Although they appear looted, some plundered mounds [1:6] may still contain undiscovered chambers with possible treasure (and occupants).
- Collapsed Mounds: These derelict mounds have caved in after the tomb beneath gave way.
Excavation requires 3–5x (1d3+2) the amount of time required for a Covered Mound (roll contents as normal, which turn up throughout the excavation).
–Barrow Mound Generator
Use the following procedures to determine the type, size, condition, and contents of a barrow mound as the party discovers each one.
- Step 1 (Type): (1d6) 1= Plundered; 2 = Collapsed; 3 = Covered; 4-6 = Sealed.
Step 2 (Size): Each barrow contains 1d3* chambers (see below).
- Step 3 (Condition): (1d6) 1 = partially-flooded and partially-collapsed (as below); 2 = partially-flooded (1d3* ft. deep; max. 12 ft.); 3 = dry, but partially-collapsed ([1–2:6] chance every 10 min. of further collapse = 3d6 bludgeoning damage; DC (9 + 1d6) DEX save for half); 4-6 = dry.
Step 4 (Contents): There is at least one sarcophagus within a barrow mound (roll on "Sarcophagus" below to determine contents). Each chamber also contains 1d3* of the following features (on a '1', the chamber is empty)—Roll 1d6: 1 = Trap; 2 = Monster; 3 = Grave Goods; 4 = Furnishings; 5 = Sarcophagus; 6 = Treasure.
–Trap (1d6): All trap effects have a save DC = 9+1d6.Poison Gas: 15-ft. radius; roll CON save (success = take (1d3)d6+2 poison damage; fail = reduced to 0 hp, make Death Checks as normal).
- Deadfall: A stone block drops on a random character; roll DEX save or take 3d10 bludgeoning damage.
Pit: Concealed trap doors swing open a 10x10-ft. section of the floor, dropping anyone on it into a pit (roll 1d6: 1 = 20 ft. deep plus 1d4 spikes (1d4 piercing damage ea.); 2 = 20 ft. deep; 3 = 10 ft. deep plus 1d4 spikes; 4-6 = 10-ft. deep).
- Spear: 1d3 sharpened stakes spring from the floor, ceiling, or walls. Each attack is +1d3+2) to-hit, and does 1d6+(result of attack d3) piercing damage.
Darts: Iron needles spray in a 30-ft. cone; 2d3 darts attack each target in the area of effect: +2 to-hit, 1d4 piercing damage ea.
- Collapse: A (1d3x10)-by-(1d3x10)-ft. area of ceiling caves in doing 3d10 bludgeoning damage to anyone beneath it (DEX save for half).
–Monster (1d6):- Brittle Skeletons (2d3*)
- Tomb Robbers (2d3*) – NOTE: These are only encountered in "plundered" barrows; otherwise, use skeletons or re-roll.
- Skeletons (1d3*)
- Giant Rats (2d3*)
- Skeletal Warriors (1d3*)
- Roll 1d6 on Monster Table 2:
- Hill Mummy (1)
- Desiccated Zombies (1d3*) – see below.
- Giant Viper (1)
- Huge Spiders (1d3*)
- Shadow (1d3*)
- Wight (1)
A desiccated zombie is identical to a normal zombie except for the following features:
- They are vulnerable to fire (double damage).
- They have advantage on saves to resist being turned.
- Multiattack: The zombie makes two Grasping Claw attacks on its turn.
- Grasping Claw: If both claw attacks hit, the target is grappled (escape DC 11) and the zombie can use Breath of the Crypt.
- Breath of the Crypt (bonus action): The zombie retches forth a cloud of grave miasma on a grappled target. The target must make a DC 11 CON save or suffer the poisoned condition for (1) minute. While poisoned, the target takes 1d6 necrotic damage at the start of each of their turns. At the end of each of their turns, the target can make a DC 11 CON save to end the effect.
- Zombie Plague: Any creature who takes necrotic damage from the desiccated zombie's Breath of the Crypt is potentially afflicted with deadly disease: 1d6 hours after failing the initial save, the victim must make another DC 11 CON save or lose 1 point of CON. They must make another save at the end of each hour thereafter to avoid losing additional CON. If the victim's CON is reduced to 0 by this effect, they die and are reanimated as a regular zombie within 1d6x10 minutes. Rolling a nat-20 on one of these CON saves will end the disease. Once cured, the victim recovers 1 point of CON each day unless they fail a DC 11 CON save (in which case, they gain no CON point back for that day).
–Grave Goods (1d6): If a burial alcove or sarcophagus is present in the chamber, then these items are found with the body; otherwise, they are scattered about loosely. GP values are listed in brackets (<#>).
Random Trinkets (1d3*) These personal items (combs, dice, medallions, figurines, and other such ornamentation) come in a variety of sizes and materials. In general, each trinket is worth 1d3*x10 sp.
- Death Mask (1) An important burial rite for elite hill people, they depict [d6]: 1-4 = the deceased; 5 = beast; 6 = monster or petty god.
Made of (1d6): 1-2 = wood <5>; 3-4 = clay <10>; 5 = bone <20>; 6 = metal (1d6: 1-2 = copper <30>, 3-4 = bronze <50>, 5 = silver <100>; 6 = gold <250>).
- [1:20] masks are magical and confer +1 to an ability score while worn: wood = STR; clay = CHA; bone = CON; copper = INT; silver = DEX; gold = WIS. Perception checks while wearing the mask have disadvantage, however.
Funerary Figures (1d3) These 6-12-in. high statuettes were buried with the deceased to represent loved ones, servants to assist in the afterlife, soldiers or beasts to serve as guardians, etc.
- Made of (1d6): 1 = clay <1>; 2-3 = wood <2>; 4 = bone <3>; 5 = stone <4>; 6 = metal (1d6: 1-2 = copper <5>, 3-4 = bronze <10>, 5 = silver <20>; 6 = gold <50>).
[1:6] figures also incorporate 1d6 gemstones of (1d6): 1-3 = base <10>; 4-5 = base <25>; 6 = base <50>.
- [1:20] figures with gems are magical and allow the bearer to cast one of the following spells, once per Long Rest: clay = Alter Self; wood = Barkskin; bone = Speak with Dead; copper = Magic Resistance (advantage on saves vs. magical effects); silver = Haste; gold = Daylight.
Magic figures with a single gem have a chance to recharge ONCE after a Short Rest by rolling a '6' on 1d6. Each additional gem reduces the recharge number by 1 (e.g., a figure with (4) gems recharges on 3-6; a figure with ‘6’ gems can be used twice per Long Rest, requiring a Short Rest between uses.)
- Carved Scarabs (1d3) Palm-sized charms carved in the shape of beetles, typically in the form of brooches, necklace amulets, or (smaller) signet rings.
Made of (1d6): 1-3 = clay <2>; 4-5 = stone <5>; 6 = metal (1d6: 1-2 = copper <10>, 3-4 = bronze <20>, 5 = silver <40>; 6 = gold <75>).
- [1:10] scarabs also incorporate 1d6 gemstones of (1d6): 1-3 = base <10>; 4-5 = base <25>; 6 = base <50>.
[1:20] scarabs are magical talismans (req. Attunement) that confer one of the following effects, once per Long Rest: clay = Nondetection; stone = +2 AC for 1 hour; copper = Longstrider; silver = as Ring of Protection for 1 hour; gold = +2 temporary HP per level for 1 hour.
- [1:10] magic scarabs are cursed, however. After attuning, the first time the scarab is used, the bearer must make a DC 13 DEX save or die after 1 minute as the scarab animates and burrows into their heart (only Lesser Restoration or Remove Curse can prevent death).
Canopic Jars (1d3) These funerary jars hold dried-up human internal organs which can be ground into powder and used as the basis for a potion.
- Made of [d6]: 1-3 = clay <1>; 4-5 = stone <5>; 6 = metal (1d6: 1-2 = copper <10>, 3-4 = bronze <20>, 5 = silver <50>; 6 = gold <100>).
Contains [d6]: 1 = stomach (Poison Antidote); 2 = lungs (False Life); 3 = liver (Cure Disease); 4 = intestines (Greater Healing); 5 = brain (Detect Thoughts); 6 = heart (Speed).
- Roll twice.
–Furnishings (1d6):Bronze Coffers (1d3) Each plated box holds (1d6): 1-3 = rotten/worthless sacrifices; 4-5 = minor treasure; 6 = treasure (roll on Treasure table below).
- [1:6] coffers with treasure are also trapped (roll as above).
Stone Ossuaries (1d3) Each holds (1d6): 1-3 = bones; 3-4 = bones + runic tablet ([1:6] act as a Spell or Protection Scroll); 6 = bones + moderate treasure.
- Sealed Clay Jars (1d3) Each jar is a (1d6): 1-4 = plain clay jar <1>; 5-6 = painted ceramic amphorae <1d6x10>.
Each jar holds (1d6): 1-4 = empty (dust); 5-6 = treasure (on '5', minor treasure; on '6', moderate treasure).
- Rotting Baskets (1d3) These straw offering baskets hold skulls, sacrifices of rotten vegetables and grains, or even money (1d6): 1 = 1d3* rot grubs; 2-5 = nothing of value; 6 = scattered coins (3d6 cp, 2d6 sp, 1d6 gp; on a '6' rolled for gp, add 1d3 gems <1d6x10> ea.)
Burial Alcoves (1d3) Niches in the wall hold (1d6): 1 = bones (actually 1d3* brittle skeletons); 2-4 bones; 5-6 bones + treasure (roll on table).
- Roll twice.
–Sarcophagus (1d6):- Empty
- Monster + Treasure
- Dried-up Mummy (harmless) + Treasure
- Bones
- Bones + Grave Goods
- Bones + Treasure
–Treasure (1d6)- Minor Treasure (1d3*x10 cp; 1d3*x 5 sp)
- Minor Treasure x2
- Moderate Treasure (2d3*x100 cp; 1d3*x20 sp; 1d3*x10 gp; [1-2:6] chance for 1d3* gems worth 1d6x10 gp ea.; [1:6] chance for 1d3 pieces of jewelry worth 1d3*x10 gp ea.)
- Moderate Treasure x2 (double base gp value for gems and jewelry).
- Major Treasure (1d3*x1,000 cp; 1d3*x100 sp; 1d3*x50 gp; 1d3* gems worth 1d3x50 gp ea.; 1d3* pieces of jewelry worth 1d3*x100 gp; [1-3:6] chance for 1d3* potions and/or scrolls; [1:6] chance for a magic item of low- to low-mid power level).
- Major Treasure x2 (double base gp value for gems and jewelry).
__________
Map Key
Other than the cairns and barrows marked on the map (small and large white circles), the following areas are of additional note:
–The Hidden Trail
A narrow, barely-discernible path winds up the cliff and into a pass through the imposing ridgelines to the canyon on the other side, just a few miles south of Irongate Keep. The cultists and keep denizens are unaware of this secret route.
–Harpy Nests
Clinging to the cliffs here above the lower terraces are dozens of twisted nests, the lair of (6) barrow harpies and their flock of (18) giant vultures and (48) vultures.
- Barrow harpies are identical to regular harpies except that, instead of a luring song, they possess a Terrifying Shriek: Recharge on 5-6; Every humanoid and giant within 100 ft. of the harpy
that can hear the shriek must succeed on a DC 12 WIS save or be frightened until the end of the harpy's next turn. If more than one harpy is shrieking, the save has disadvantage. While frightened by the harpy, a target is incapacitated and its Speed is reduced to 0. Any damage caused by the harpy that frightened the victim does not break the fear effect.
The harpies have reached an accord with the tomb robbers’ leader, who has lavished “tributes” of red gold on the harpies in exchange for them not molesting her men. The cursed red gold has begun to make the harpies suspicious and covetous of their sisters’ caches, however. As a result, the harpies rarely venture far from their nests. The vultures roam much farther to scavenge and return carrion for their harpy mistresses.
- Each harpy commands (3) giant vultures and (8) vultures; when a harpy is slain, her constituent flock is divided among the remaining harpies.
On the rare occasions that a harpy ventures out, she takes 1-2 giant vultures and 2-4 vultures with her; the rest remain to protect the nests (and her treasure).
- Each vulture nest (24 total) contains 0-2 eggs. In each harpy nest (6 total) can be found the following…
- Major treasure (see Treasure table above).
- [1:6] contains an egg.
- 2d4 harpy feathers
–Tomb Robber Camp
The Cult of Khoss has mounted an expedition to raid this area for treasure and undead minions to fund/support their plans against the keep. They have hired a band of ruthless tomb robbers from the southern desert to perform the dangerous and grueling task of opening the graves and looting the goods.
A dozen 2-man tents cluster among the pine tree canopy, surrounded by a loose picket of pine timber barricades bristling with sharpened stakes. The picket is surrounded by an outer ditch (10-ft. deep x 10 ft. across).
- Two openings in the picket (one to the northeast, the other to the west) permit access into the camp. Each open "gate" has a narrow, 15-ft. long plank spanning the ditch.
Moving across the plank bridge at greater than half-speed (or fighting while on it) requires a DC 12 Acrobatics check to avoid falling into the ditch.
Passing through the barricades requires expending an Action and half the character's maximum Speed to make a DC 12 Athletics check. Failure means the character becomes snagged in the pine branch stakes and is restrained until the start of their next turn when they can try again.
- The camp is occupied by 20 tomb robbers, whose work is overseen by a necromancer named Yavela and her two cultist thugs.
Ten tents are occupied by a pair of tomb robbers each (treat as commoners armed with picks, clubs, and daggers; 1:4 also use a light crossbow; each tomb robber carries 1d3 trinkets, 4d3 cp, and 2d3 sp; 1:6 also have 1d3 gp). The tents also contain the tomb robbers' tools, gear, and food/water.
- One tent is occupied by the thugs (as standard thug but with the cultist's Dark Devotion ability that gives them advantage on saves to resist being charmed or frightened).
The remaining tent is Yavela's. Inside is a cot and blanket and a chest (which is locked and trapped (both DC 16) with a poison needle: DC 14 CON save or die; success = take 3d6 poison damage). The chest contains: ten days' rations; two bottles of wine; several sets of robes; two vials of blade poison (as the trap above); a leather bag (1,200 sp); a lead box (650 red gp); and a scroll tube containing a pair of maps (one map shows the route from the keep to this box canyon; the other is Yavela’s sketch of the area along with several ‘x’s (plundered cairns) and a circled area near the center with a scribbled note: “dolmen?”
Yavela is a level 5 cultist wizard (necromancy) with 24 hp and the Dark Devotion ability (in addition to her necromancer features).
- Possessions: She wields a poisoned dagger (see above) and a minor Wand of Scorching Ray with 7 charges left (the wand cannot be recharged; once all charges are expended, the item becomes inert). She also carries a Potion of Greater Healing, three Spell Scrolls (Invisibility and Animate Dead x2), and a dose of lethal ingestive poison hidden in a false tooth that she will use to prevent capture and interrogation.
Spells: (cantrips) Light, Mage Hand, Poison Spray, Toll the Dead; (1st) Charm Person, Comp. Languages, Detect Magic, Floating Disk, Fog Cloud, Identify, (2nd) Animate Dead, Bestow Curse.
–The Dolmen Tomb
Near the center of the canyon, the pine thicket gets unnaturally dense in a ring approximately 300 ft. in diam. and 75 ft. thick. The clearing in the inner area of the ring is 150 ft. in diam., at the center of which is a 30-ft. high barrow mound capped by a stone dolmen, uncovered by centuries of exposure to the elements.
- DC 12 Perception = Rangers, druids, and elves can sense an ancient magical (druidic) influence on the area.
- Except for rangers and druids, the dense thicket further reduces movement by half, on top of the normal difficult terrain penalty, and provides 1/2 cover to any target greater than 10 ft. away, and 3/4 cover to any target greater than 20 ft. away.
The foliage totally obscures line-of-sight at more than 30 ft. away.
- Melee attack rolls by slashing or bludgeoning weapons within the thicket have disadvantage due to blocking (rangers and druids can make a DC 12 WIS save at the start of their turn to overcome this effect until the start of their next turn).
- The inner circle is clear of trees, although the mound blocks direct line-of-sight to the opposite side. The mound is surrounded by eight large rock cairns. Interred within each cairn is a skeletal warrior, (2) skeletons, and (4) brittle skeletons.
If a cairn is disturbed, the undead buried within will emerge and attack the violator. There is no treasure within any of these cairns.
- Each cairn is also tied to a crypt inside the barrow tomb, corresponding roughly to its orientation around the dolmen. The southernmost cairn is tied to the tomb seal in the dolmen.
As each corresponding crypt in the dungeon below (or the stone seal) is opened, the undead in the associated cairn rise and begin patrolling the inner circle formed by the cairns, moving methodically around the barrow mound in a counter-clockwise direction.
- These undead will act to prevent any looters from escaping the tomb when they exit. They will pursue into the ring of dense foliage (and are unaffected by it), but will not pass beyond the ring's outermost border.
- Inside the dolmen's enclosure, a heavy stone slab (8-ft. long x 6-ft. wide) is set into the dirt floor.
Prying the stone seal open requires at least four laborers with proper tools (pick, sledgehammer, crowbar, rope) and takes 1 hour + (1d6 x 10) mins.
- Beneath it, a rough stone staircase descends into a tomb complex in which the former chieftain of the Coyote clan is interred, along with his faithful retinue and the clan's treasures. (The dolmen tomb dungeon will be detailed fully in an upcoming post.)
NOTE: In my campaign, when the players find the dolmen tomb, a band of tomb robbers already discovered the dolmen tomb, removed the stone seal, and began exploring the tomb. In doing so, the undead occupants of the southernmost stone cairn outside the dolmen have emerged from beneath the rock pile and now patrol the base of the mound, waiting for the tomb robbers to exit. The undead attacked the party as they approached the mound.
Here is a link to a Google doc of the above write-up.
No comments:
Post a Comment